
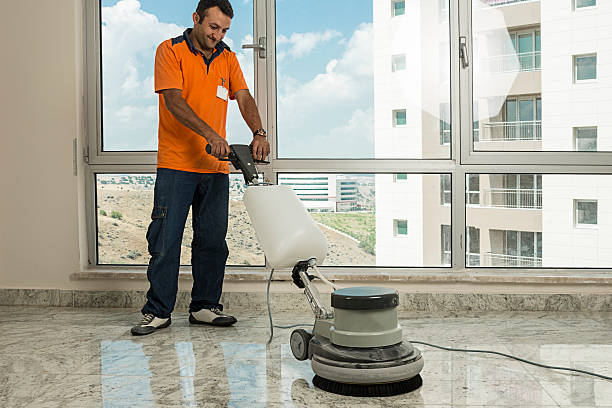
Marble polishing is a vital process to enhance the beauty and longevity of your marble flooring. This method involves a series of systematic steps that anyone can follow to restore the natural shine of marble surfaces. To begin, clear the area of any furniture or debris to ensure an unobstructed workspace. Start by sweeping or vacuuming the floor to remove loose dirt and dust. Next, use a mild detergent mixed with water to mop the floor and eliminate any stubborn stains. Once the surface is clean, it’s time to focus on polishing. Begin with a low-grit abrasive pad attached to a floor buffer machine. Move the buffer across the floor in a consistent manner, ensuring even coverage. Gradually progress to higher-grit pads to achieve a smoother finish. It’s essential to keep the floor wet during this process to prevent overheating and to enhance the effectiveness of the abrasive pads. Marble floor polishing requires careful consideration and proper techniques to achieve a beautiful, glossy, and durable finish.
Here’s a step-by-step guide to one of the most commonly used methods for polishing marble floors, known as the wet polishing method:
Step 1: Surface Preparation
Before initiating the marble polishing process, ensure the marble surface is clean and free from dust and debris. A gentle sweep or vacuuming can eliminate loose particles that may scratch the surface during polishing. For more stubborn stains, use a pH-neutral cleaner to avoid damaging the marble.
Step 2: Honing the Surface
Honing is a vital step in the marble polishing process. It involves the use of diamond abrasives to remove minor scratches and etches, restoring the smoothness of the surface. This step is crucial for achieving a uniform finish and preparing the marble for the subsequent polishing stages.
Step 3: Polishing with Diamond Abrasives
The key to achieving a high-gloss finish lies in using diamond abrasives of varying grits. Begin with a coarse grit to remove any remaining imperfections, gradually progressing to finer grits for a smoother finish. The use of diamond abrasives ensures precision and consistency in the polishing process.
Step 4: Buffing for a Mirror-Like Finish
Once the diamond abrasives have done their job, it’s time to bring out the buffing pads. These pads, typically made of synthetic materials, add the final touches to the marble surface, imparting a mirror-like sheen. It’s crucial to use a marble-specific polishing powder during this step to achieve optimal results.
Step 5: Sealing for Long-Lasting Shine
To preserve the polished look and protect the marble from stains and moisture, sealing is imperative. Choose a high-quality marble sealer and apply it evenly across the surface. Allow sufficient drying time, ensuring the sealer forms a protective barrier that enhances the longevity of the polished finish.
Maintenance Tips:
Regular Cleaning: Wipe the marble surface with a soft, damp cloth regularly to prevent the accumulation of dirt and dust.
Avoid Acidic Cleaners: Acidic cleaners can damage marble, leading to etching. Stick to pH-neutral cleaners to maintain the integrity of the surface.
Use Coasters: Place coasters under glasses and other items to prevent potential scratches and stains from beverages.
Prompt Stain Removal: Deal with spills promptly to prevent stains from settling into the marble.
Conclusion:
Achieving a flawless, polished marble floor requires a systematic approach that involves surface preparation, honing, diamond abrasives, buffing, and sealing. By following these steps and incorporating proper maintenance practices, you can ensure your marble floors remain a stunning focal point in your home or commercial space, standing the test of time with enduring elegance. Read more